|
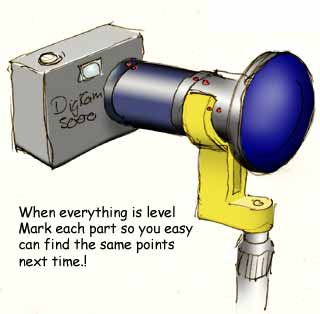
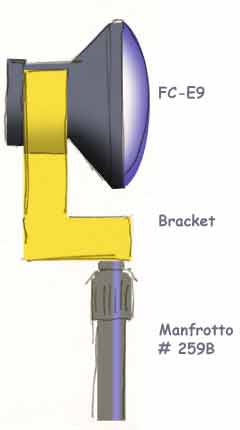
Mounting
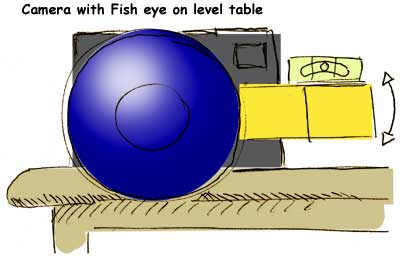
the lens and camera. Whenever you photograph with the bracket it is important to level the rig. With the FC-E9 and the bracket mounted to the camera, place the camera on a level surface such as a table, then place your bubble level on the side of the bracket and gently rotate the bracket until it is level. That's it. You are ready to go.
|
|
|
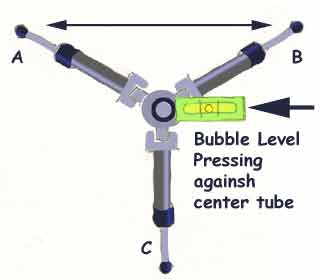
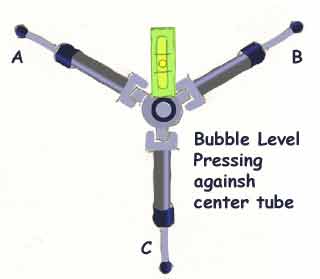
Level the tripod To save weight and more importantly to reduce the footprint of the tripod in my pictures, I always remove the tripod head and instead use the legs to level the tripod.
I find the easiest way to level a tripod is to devide the job into two parts. The first step is to level the the top two legs, I call them A and B. press a bubble level against the center tube as shown in the illustration, so it is parallel with the line between A & B. then by adjusting the length of either A or B bring the bubble level to center. Next continue by pressing the bubble level against the center tube opposite leg C, then extend or shorten leg C until the bubble level is centered. Now you have leveled the tripod, just for kicks check both angles again, in case you did hit it while working.
Mount the camera on the Tripod.
Having mounted and adjust the level of the manfrotto tube, release the lock collar on top of the tube and carefully screw it into the bottom of the bracket. I like to place the bubble level in the cameras hotshooe to make sure it is perfectly level when I take the first picture. You are ready
to go. I like to aim the camera with the body of the camera hanging
over one leg pointing forward between the two other legs. This is easy
to right when photographing, and it also places two tripod feet in each
of the three pictures (I prefer
photographing 3 frames 120 degrees apart.) Having the two tripod
feet in the picture creates a predictable reference point for stitching
later.
TIP. Make life
a little easier, I prefer to adjust my exposure BEFORE mounting the
camera on the tripod, since it is a lot easier to work with the camera
settings when you can point it and tilt it to see what you are looking
for, if I make test exposures, I always zoom all the way in so they
are easy to recognize from the actual panorama exposures later at home.
Remember to zoom back out before you start photographing. |
|
 Next
screw the manfrotto extension tube on top of the tripod, check that
this tube also is level. (Often people find that the top part of their
tripod tube is not entirely level, if that is the case, you perform
the leveling procedure by pressing the bubble level against the manfrotto
tube, since this is the tube the camera will be rotating around.
Next
screw the manfrotto extension tube on top of the tripod, check that
this tube also is level. (Often people find that the top part of their
tripod tube is not entirely level, if that is the case, you perform
the leveling procedure by pressing the bubble level against the manfrotto
tube, since this is the tube the camera will be rotating around.